

How To Create Calendar Event In Outlook
How to Add Events to Outlook Calendar?
October 26, 2021 Molly Owen
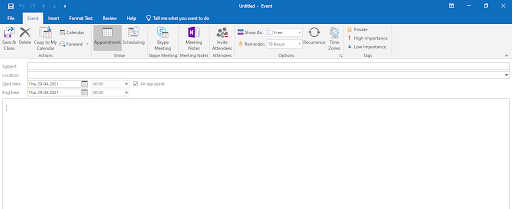
Microsoft Outlook is an excellent email client that allows you to not only send and receive emails but even to keep track of all your day-to-day events. These events could be activities that last for 24 hours or more. Some of these events include birthdays, meetings, group schedules, reminders, etc. All these can be done using the Calendar and scheduling component of your Microsoft Outlook that is fully integrated with e-mail, contacts, and other features. Actually, these events do not display in individual time slots as appointments do. They are displayed in a small banner area just below the date heading. If you are new to Outlook and want to know how to add events to your Outlook calendar, then read this article to know the procedure. In the process of creating events to Outlook calendar, if you delete any of your emails permanently by opting for the wrong option. Then you can use the Remo Repair Outlook PST tool. The utility can easily repair your PST file and recover all your deleted emails, contacts, events, and calendar items with just a few clicks. Remo Repair PST is a reliable Outlook repair tool that easily repairs broken, corrupt or damaged files on all the versions of Outlook including the latest Outlook 2019. Furthermore, this tool is compatible with all the latest versions of Windows operating system including Windows 10. How to Add Event to Outlook Calendar?

Note: Any event, regardless of its type is considered a new item. And each new event has to be entered separately. 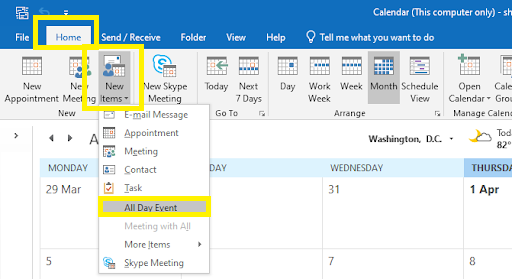


Molly is the Lead Technical Specialist with distinguished knowledge and understanding of Mac computers and operating systems. Being a veteran photographer and video recovery specialist, Molly's expertise on video formats and file repair has helped restore a lot of videos and cherished memories of users.
As a technical specialist she also believes in learning and spreading knowledge about the current and trending aspects of various media formats, Adobe Photoshop and macOS troubleshooting. A full-fledged learner, caffeine-lover and a firm-believer that technology would make the world a better place.
How To Create Calendar Event In Outlook
Source: https://www.remosoftware.com/info/how-to-add-events-to-an-outlook-calendar
Posted by: perezuncer1996.blogspot.com
0 Response to "How To Create Calendar Event In Outlook"
Post a Comment